10 Best Steps to Install Smart LED Bulbs in Your Home?

Time:2026-05-05 Author:Isabella
0%

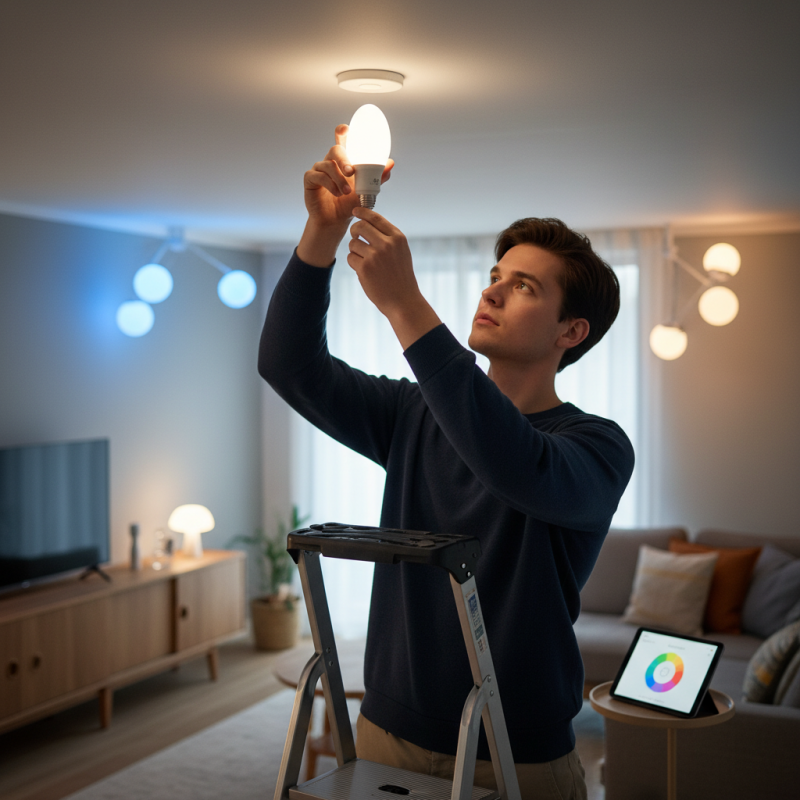
Installing smart LED bulbs can transform your home into a more efficient and modern space. Many homeowners wonder, "How to install smart LED bulbs in your home?" This process is simpler than you might think. With a few steps, you can enhance your lighting experience and enjoy the benefits of smart technology.

Before you start, ensure you have the right tools and compatible smart bulbs. Familiarize yourself with the features of your chosen bulbs. Many people overlook this step, leading to frustration later on. Understanding how to connect them with your smartphone or smart home system is crucial.

Take your time during installation. Rushing can lead to mistakes. Secure connections are vital for optimal performance. Don't hesitate to refer to the manufacturer’s instructions for guidance. With patience and the right approach, your home’s lighting will reach a new level of convenience and style.

10 Best Steps to Install Smart LED Bulbs in Your Home?

How to Choose the Right Smart LED Bulbs for Your Space

Choosing the right smart LED bulbs can greatly enhance your living space. Start by considering the brightness you need. Measured in lumens, the brighter the bulb, the more lumens it has. A cozy living room might only need 800 lumens, while a kitchen requires more, around 1600 lumens.

Next, focus on color temperature. Smart LED bulbs often offer a range from warm white to bright daylight. Warmer tones create a relaxing environment, perfect for bedrooms. On the other hand, cooler tones can increase alertness in work areas. It’s about creating the right mood for each room.

Energy efficiency is another key factor. Look for bulbs with high energy ratings. Not only do they save on electricity, but they also last longer. However, be cautious about compatibility with existing smart home systems. Researching this can save time and frustration later. Don't hesitate to experiment with different options; finding what fits your needs best can take time and patience.

Preparing Your Fixtures for Smart LED Bulb Installation

When preparing your fixtures for smart LED bulb installation, it’s crucial to assess the current setup. More than 40% of households still use traditional incandescent bulbs. Transitioning to smart LED bulbs requires a simple fixture adjustment for optimal performance. Check socket compatibility first. Most smart LEDs fit standard sockets, but some may require specific bases or adaptors.

Next, ensure the fixtures are clean and free of dust. Dust can affect connectivity and light quality. According to industry reports, cleanliness contributes significantly to the longevity of electronic products. Regular maintenance can increase an LED bulb's lifespan by up to 30%. Inspect fixtures for any damage. A cracked or broken fixture can lead to potential safety hazards when integrating smart technology.

Proper electrical measurements are essential. Verify wattage limits to avoid overload, which presents safety risks. Light fixtures can only handle a specific wattage, and exceeding this can lead to overheating. Many consumers overlook this detail. Moreover, confirm that your existing fixtures are in good working condition. In some cases, improper wiring may necessitate professional guidance. Awareness of these details ensures a successful installation while safeguarding your home.

Smart LED Bulb Installation Steps

Step-by-Step Guide to Installing Smart LED Bulbs

Installing smart LED bulbs in your home can enhance your living experience. Follow this simple guide to get started.

Ensure your fixtures are compatible with smart bulbs. Remove the existing bulb carefully, and inspect your light fixture for any damage. This is an opportunity to clean the lampshade or fixture for better light output.

When installing, align the smart bulb with the socket. Gently twist it in until secure. Avoid using excessive force to prevent damaging the bulb. After installation, power on the light switch. The smart bulb should come to life.

Tips: Test different colors and brightness settings. It is common to find the perfect ambiance takes time. Don’t hesitate to adjust as necessary. If the bulb doesn’t connect to your app, double-check your Wi-Fi settings. Sometimes, parts of the setup may require reapplying the instructions.

Lastly, make use of voice commands and automation settings for convenience. However, take note that not all commands will work right away. Experimentation is essential for optimizing your setup. Remember, patience can make the difference in creating your ideal smart home environment.

Connecting Smart LED Bulbs to Your Home Wi-Fi Network

Installing smart LED bulbs can enhance your home’s ambiance and energy efficiency. To connect these bulbs to your home Wi-Fi network, start by ensuring your network is stable. An unstable connection can lead to frustration and failure during setup. Follow the manufacturer's instructions for your bulb model closely.

When setting up your smart LED bulbs, try to keep your smartphone or tablet close to the bulbs. This helps maintain a strong connection during the pairing process. If the connection is unsuccessful, you might need to reset the bulb and try again. Details matter here; check if the bulb is in pairing mode, as some may require specific actions to activate it.

Tips: Make sure your Wi-Fi is on a 2.4 GHz network if possible. Many smart bulbs do not support 5 GHz. Periodically review your network settings to ensure compatibility. Seek assistance from online forums if you encounter issues. Learning from others can save you time and headaches.

Configuring Smart LED Bulb Settings Using an App or Device

Configuring smart LED bulbs can feel overwhelming at first. Yet, a well-organized approach makes the process manageable. Start by downloading the app associated with your bulbs. Ensure your smartphone connects to the same Wi-Fi network. This helps in seamless communication between your device and the smart bulbs. Once the app is installed, create an account and follow the in-app instructions. You might encounter some hiccups, like the app failing to recognize your bulb. Don't worry; checking the bulb’s power source can often resolve this issue.

After the initial setup, explore the app's features. Most applications allow you to customize brightness, colors, and schedules for your bulbs. You could find the color selection overwhelming. Take time to experiment with various settings to achieve the desired ambiance. Setting schedules can help maintain energy efficiency. However, remember that forgetting to adjust settings can lead to unnecessary usage. Regularly revisiting your configurations ensures you are maximizing the benefits while minimizing energy consumption.

FAQS

: How do I prepare my fixtures for smart LED bulb installation?

: Assess your current setup. Check socket compatibility and ensure fixtures are clean and undamaged.

What should I check before installing smart LED bulbs?

Verify wattage limits to prevent overload. Ensure fixtures work well and are not damaged.

Why is cleanliness important for fixture performance?

Dust affects connectivity and light quality. Clean fixtures can extend an LED bulb's lifespan by up to 30%.

How do I connect smart LED bulbs to my Wi-Fi network?

Ensure a stable network. Keep your device close to the bulbs and follow manufacturer instructions closely.

What if my smart bulb won’t connect to Wi-Fi?

Check if the bulb is in pairing mode. Resetting the bulb may help resolve connection issues.

Are there specific Wi-Fi settings recommended for smart LED bulbs?

Yes, use a 2.4 GHz network. Many smart bulbs do not support 5 GHz.

What steps should I follow to configure my smart LED bulbs?

Download the app for your bulbs, connect to Wi-Fi, and follow the app instructions for setup.

What features can I customize using the app?

You can adjust brightness, colors, and set schedules for your smart bulbs.

What if the app fails to recognize my smart bulb?

Check the bulb’s power source. Ensure it is powered on and reset if needed.

How can I maximize energy efficiency with smart bulbs?

Set schedules for usage. Regularly review settings to avoid unnecessary energy consumption.

Conclusion

Installing smart LED bulbs in your home can enhance your lighting experience and provide greater control over your environment. To effectively answer the question, "How to install smart LED bulbs in your home?" start by choosing the right bulbs for your space, considering factors like brightness, color temperature, and compatibility with your devices. Preparing your fixtures is essential to ensure a snug fit and optimal performance.

Once you've selected and prepared your fixtures, follow a step-by-step guide for installation. This typically involves turning off power, removing old bulbs, and inserting the smart LED bulbs securely. After installation, connect the bulbs to your home Wi-Fi network, which allows for seamless control through an app or smart device. Finally, configure the settings via the app to customize your lighting preferences, enabling features like scheduling and remote access for a smarter home environment.

Isabella

Isabella

Isabella is a dedicated marketing professional with a sharp focus on driving brand growth and engagement through strategic content creation. With an extensive background in digital marketing, she combines her passion for storytelling with her keen understanding of industry trends to deliver......